WinForms - Getting Started
A short tutorial showing how to build your first winforms project
Winforms - What is it?
Winforms projects are a simple way to get started with C# programming. They combine a simple front end (screen) with a closely linked backend (code).
Below is a very short overview of how to build a simple winforms project using C#. For guidance with a bit more clarity follow this link to my winforms resources link here
How to work with Winforms (a short guide)
You’ll need some free software, MS Visual Studio Community Edition, available here –> Download Visual Studio.
To start a winforms project simply follow these steps 1:
1. Open Visual Studio and Create an Account if asked.
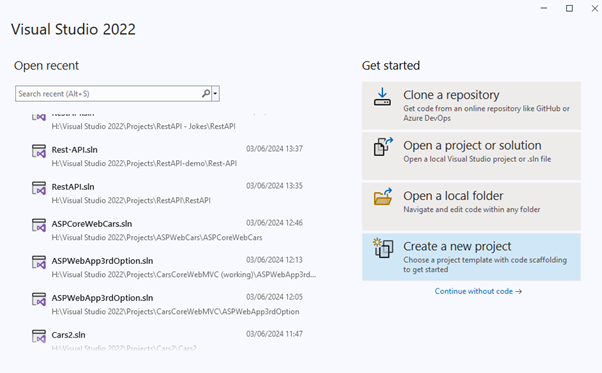
2. Create a New Project
Choose Create a New Project from the menu:
3. Select the Project Type
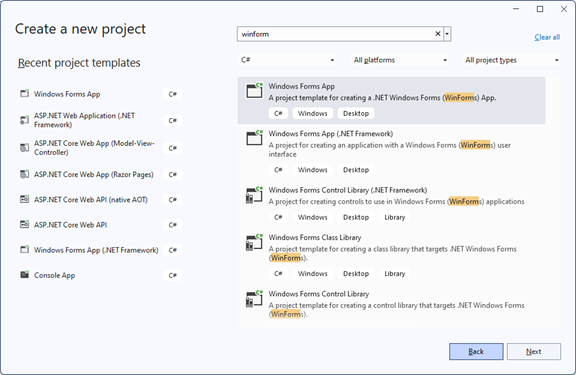
Type “winform” into the search bar at the top and select the C# Windows Desktop project
4. Save Your Project
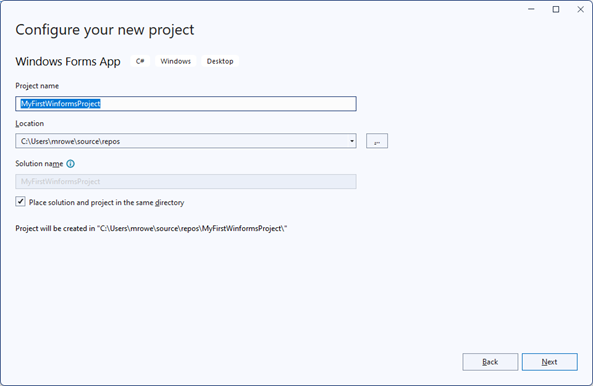
Save your project in a suitable location and give it a name. Then click Next.
5. Select A Framework
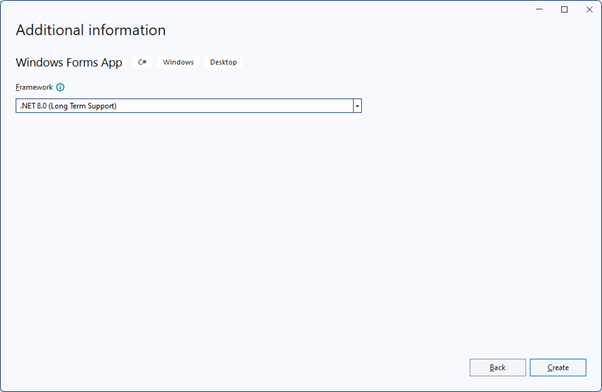
For this project the framework is unimportant, select whichever is on display and click Create.
6. The IDE (Integrated Development Environment)
In the centre of the screen is your “Form”, this is what your users see. On the left is your Toolbox select (View/Toolbox) if you can’t see it. On the right are the properties. If you draw any object on the form you can set its properties (colour/text/name etc…) by editing the attributes in the Properties Window.
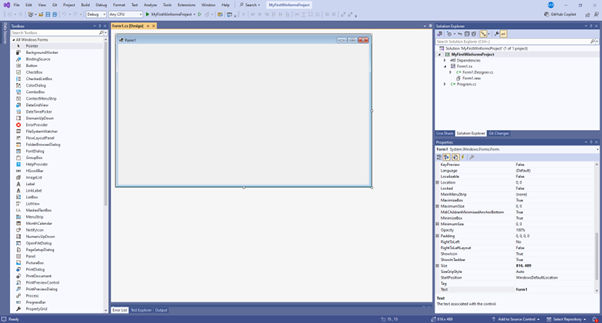
7. Reset the Window Layout (optional)
If your window doesn’t look like that shown in step 6, simply select Window/Reset Window Layout:
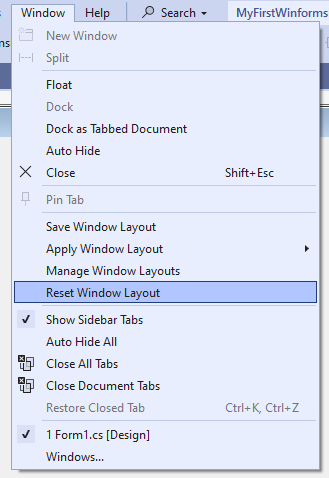
8. Populate your form
Add a “button” and a “textbox” onto your form by dragging and dropping them from the toolbox onto the form:
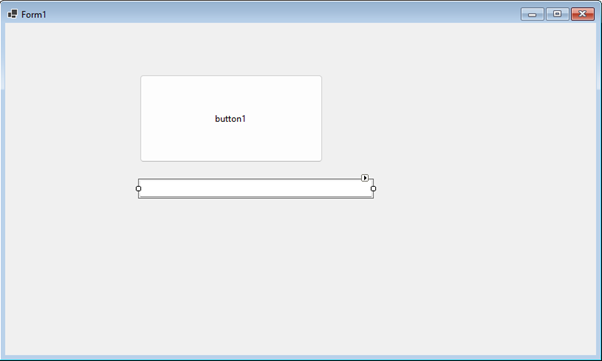
Note: Normally you would use the “Properties Window” at this point to set the object names etc, but for speed we are going to skip this step (this is bad practice!)
9. View the C# code
Double click the button to view the code. The first time you see C# it can appear to be a bit intimidating. For now, you need to understand that the {curly brackets} signify the start and the end of a block of code. The block we are interested in starts on line 10 and finishes on line 13. This is our “Click” event, (the code which is run when our button is clicked).
|
|
10. Coding
Enter the following code:
|
|
11. Run The Application
Press the green “play” button to test your code:

12. Test 1
You should be able to enter a message and have it returned:
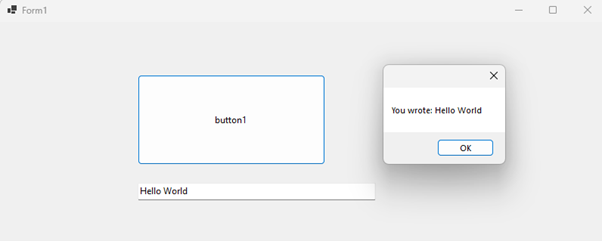
13. Test 2
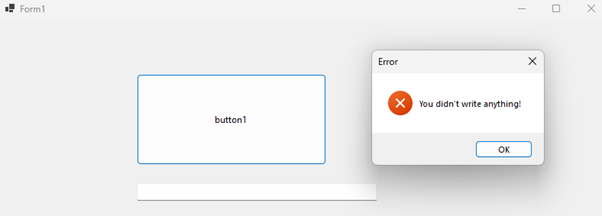
Or enter nothing and see a much more elaborate message box tell you there is an error. Note: This is elaborate because it has a title and an icon, which you specified in your code (lines 25..28)
-
This was a very short overview of a very simple app, the images are not totally clear and the explanations are brief. If it worked for you that is great but, please take the time to view my Word docs [link here] for properly detailed guides. ↩︎
